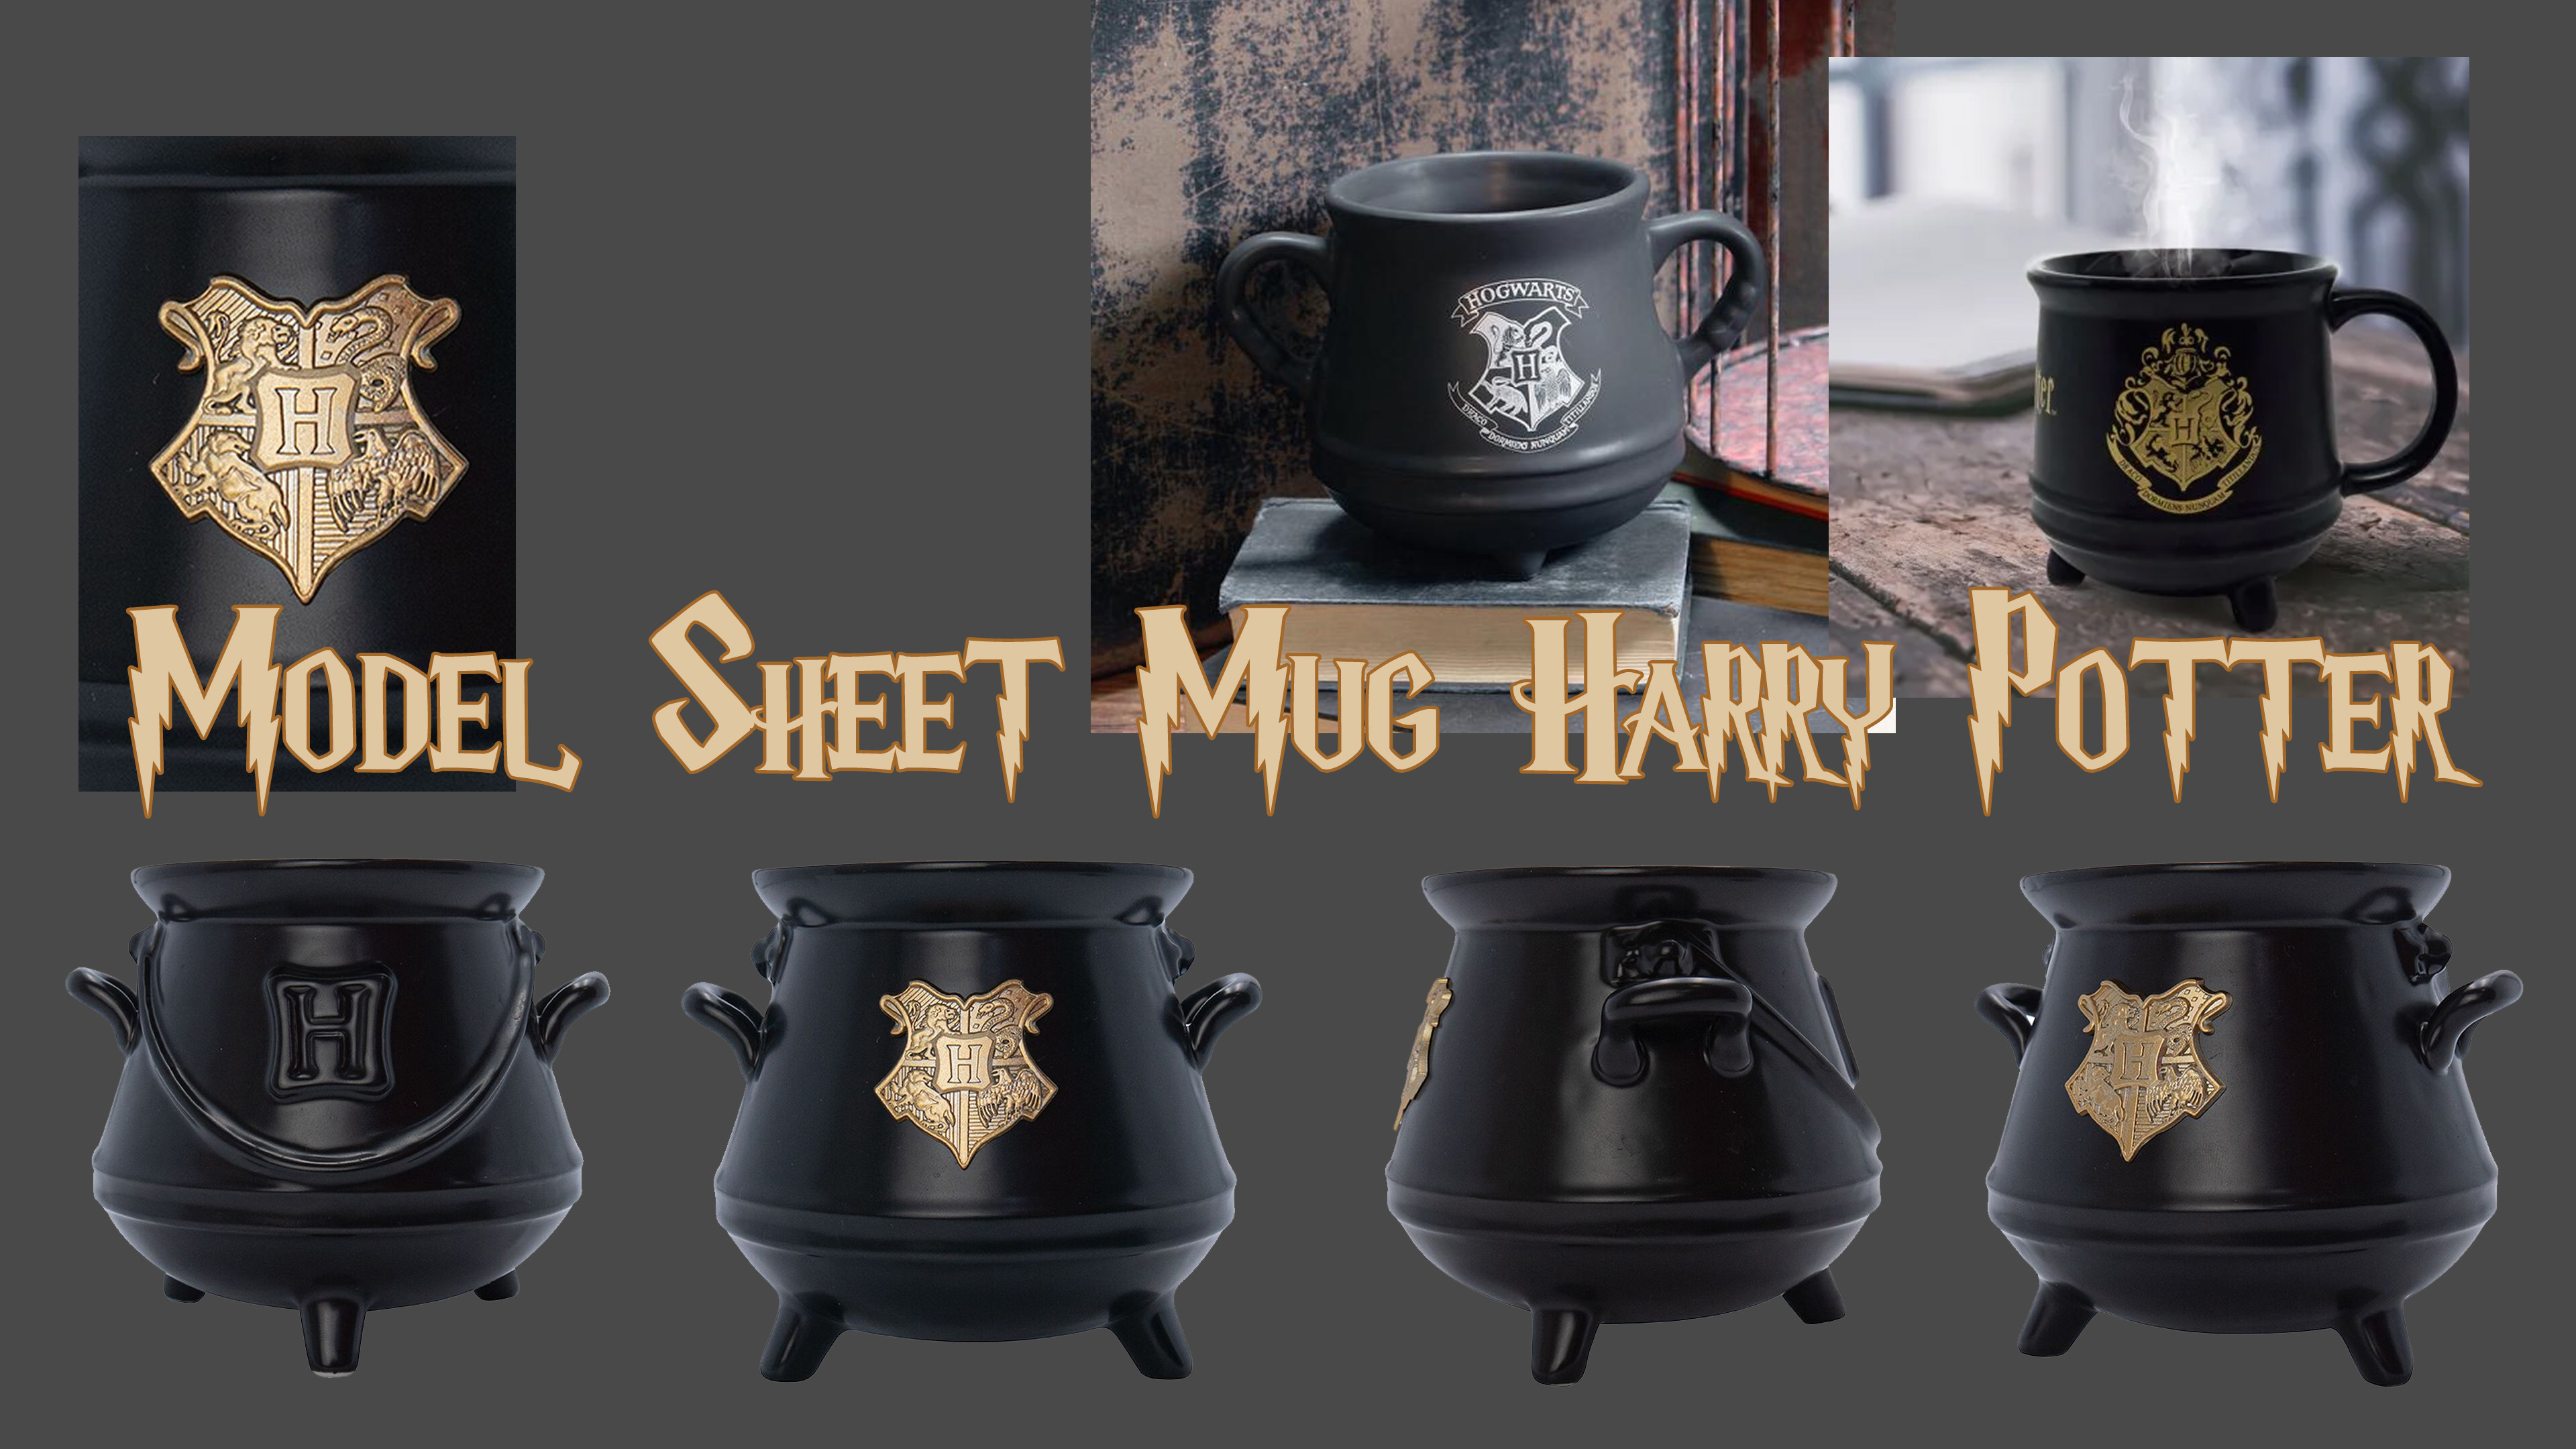
As shown below, for the mug creation process, I made a model sheet based on reference photos provided. I began by using Blender to create the basic 3D geometry of the prop, and then used ZBrush to add fine details and ornaments, ensuring accuracy and fidelity to the original model.
In the video below, you can see that after working on the mesh's clean retopology and UV layout using both Blender and ZBrush, I moved on to Substance 3D for the baking and texturing process.
For the creation of the old book, I also used Blender for polymodeling. To find inspiration for the dust jacket design, I browsed the internet, where the title 'Carpe Diem' came to mind. I then used ZBrush to sculpt the engraving and embossing, applying efficient techniques.
As shown in the sped-up video below, I completed the retopology and UV layout of the mesh using both Blender and ZBrush, followed by baking and texturing in Substance 3D.
For the wooden planks where the props are placed, I sculpted them in ZBrush and Adobe, then retopologized and unwrapped the UVs using Blender and ZBrush, and completed the baking and texturing in Substance 3D.
To finalize the project, I exported all the props and textures into Unreal Engine, along with scanned assets like the apple and basil. I set up a layout with cameras and lights, created UE materials, and made final adjustments in Unreal to achieve the visual results displayed at the top of this webpage.
Additionally, I added the beautiful soundtrack from the Harry Potter film to the clip and completed the cinematic editing in Unreal Engine using Adobe Premiere Pro. Below is the model sheet of the Harry Potter mug that I used as a reference to create it as a 3D real-time asset.
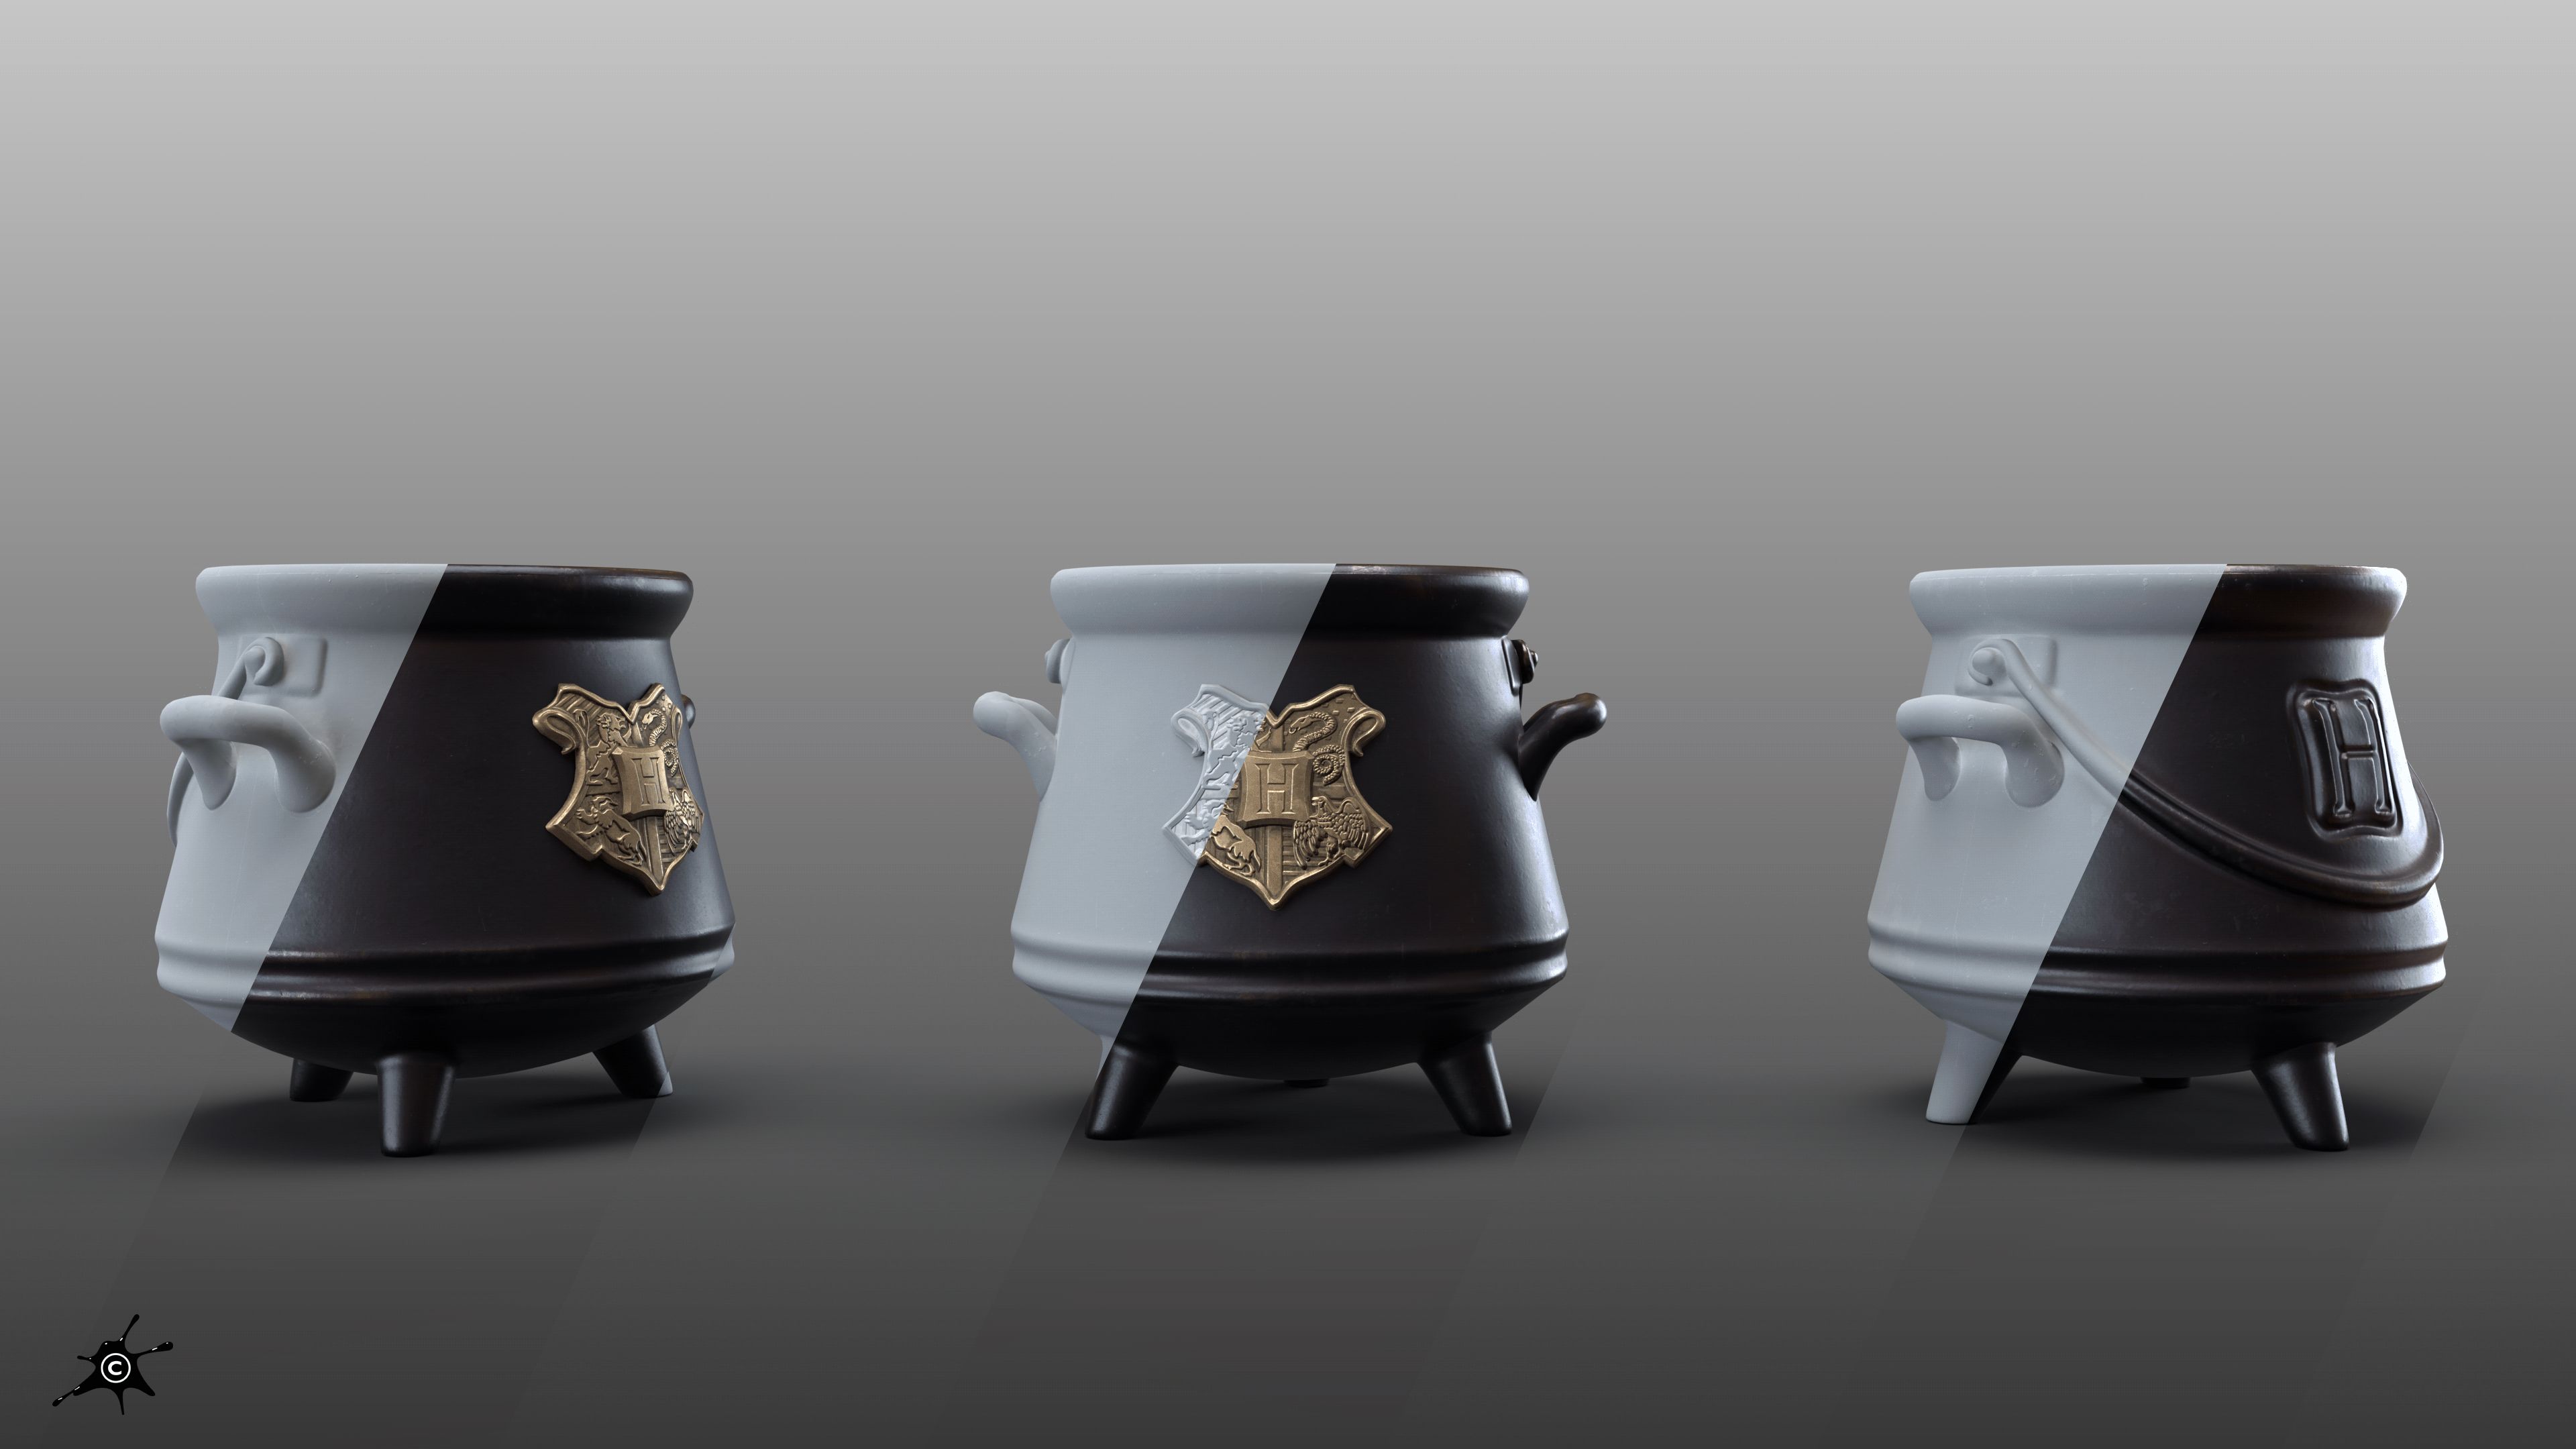

This is the model sheet of the Harry Potter mug, which I used as the foundation to create it as a 3D real-time asset.